Quality testing is an important control measure for any compressed air system. Particularly in the food industry, a variety of pitfalls exist that can cause compressed air tests to fail. It is important to isolate common problems, particularly those regarding sampling ports and testing techniques. Sometimes the air itself is compliant, but the tests fail due to inaccuracies or flaws in the system. The following instructions will allow you to troubleshoot and address basic issues that can occur during compressed air testing.
Compressed Air Standards and Regulations
- INFOSAN – International Food Safety Authorities Network
- IFS – International Featured Standard
- SQF – Safe Quality Foods
- FDA – Food and Drug Administration
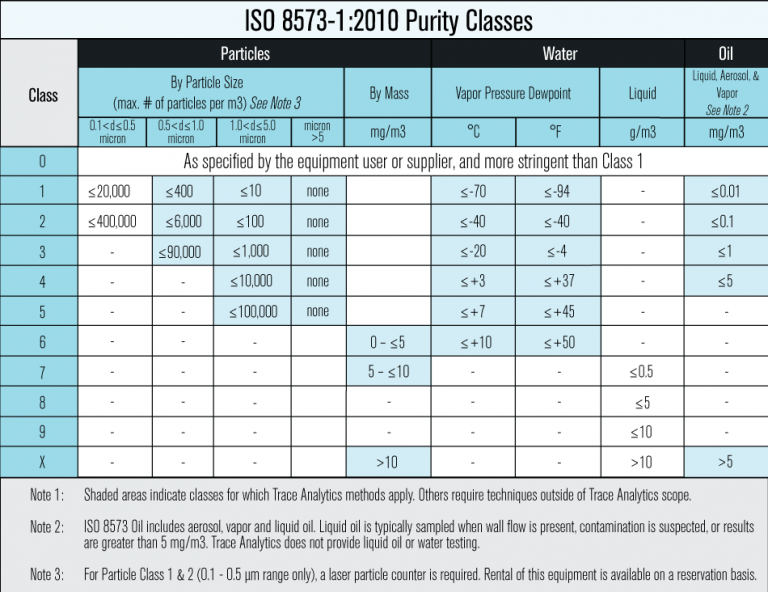
It’s important to understand which regulatory bodies your company should adhere to. Most standards require manufacturers to develop their own risk assessment and evaluate their systems accordingly. ISO-8573 is a standard guide that most manufacturers use. This doesn’t have to be followed exactly, but can be used in accordance with your risk assessment to ensure that your system is functioning safely. ISO-8573 doesn’t provide specific advice, but does outline methods and specification limits that can be useful in determining whether or not your system is operating properly.
Below is the ISO-8573 purity class chart. You can pick and choose by contaminant which purity classes you would like to meet. See more information on assessing your risks and choosing purity classes here.
All compressed air systems are dynamic. This means that your system will experience changes over time. It will exhibit both short-term and long-term trends which can affect your product’s safety. These trends can vary based on system age, choice of materials, compressor positioning and the order of filtration.
How is Compressed Air Measured and Why Does It Fail?
It’s important to understand how you are taking your compressed air measurements. Different measurement types are better for different system’s needs and can lead to different failure modes.
Methods for Compressed Air Particle Detection:
- Laser Particle Counter (LPC): These machines measure particles directly and are very accurate, easy to use and fast. LPCs can count particles down to 0.1 micron. Keep in mind that these results are a representation of the system at that time. Since air compressor systems are dynamic, LPCs will only provide a snapshot of your system. These machines are expensive and bulky, and will need regular calibration.
- Condensation Nucleation Counter (CNC): These work by condensing vapor on particles which makes them appear larger and therefore easier for an optical sensor to see. Unfortunately, it is difficult to tell exactly what size the particles are when using this instrument, so there is no way to separate particles into different classes. These machines can also be bulky and expensive and they, too, require regular calibration.
- Membrane Counting or Microscopy: This type of system provides an overview of your system rather than a real time measurement, so it is a better representation of a dynamic system. This method is also relatively inexpensive. Unfortunately, you will not be able to see particles under 0.5 micron due to diffraction effects. If you are trying to meet a very strict ISO-8573 class, then this method will require a longer sampling time.
Why Particulate Tests Fail:
Old or ineffective filtration can cause your particulate tests to fail. If the filters are not working properly because of age, they can allow particles to pass through.
Leaks can also be a common cause for failure. If air is moving quickly through the system, and there’s unrestricted flow, this causes a suction effect which can pull in outside materials through the leak into the system.
Environmental contamination may also occur through the intake of the compressor. Construction materials and other particulates in the ambient air can often contaminate your compressed air, and end up coming out through your point of use.
Another extremely common cause of particulate failure is poor piping materials. Black iron, soft rubber and other piping materials can shed particles and should be avoided after filtration. If you need to meet strict particle classes, do not use these materials. Poor choice of fittings, unions or valves can also have an impact on the particle count. Avoid the use ball valves or conical fittings. Both are particularly problematic because they have a lot of surface area and therefore a lot of potential for contamination. Another piping issue arises when manufacturers connect metals of differing hardness. Vibrations throughout the transition between copper and steel, or aluminum and steel for example, can cause particles from the softer metal to be released into your air stream.
Methods for Compressed Air Water Vapor Detection:
- Electrochemical Sensor: These sensors detect water vapor by using materials whose resistivity changes in the presence of water vapor. Although they are fairly accurate and easy to install, these have very long sampling times, particularly for extremely low dew points. Once there is water on the sensor, it can take a very long time to flush the water off. These sensors tend to be used in permanent installations and are very expensive. There are also additional costs because you must pay for dew point limits. Keep in mind that these sensors require periodic calibration which can also be costly.
- Chilled Mirror Hygrometer: This type of sensor acts as a dew point hygrometer. These systems have a mirror that gets very cold as the air flows past it. As the mirror chills, it will condense water vapor out of the air. Inside, a light beam bounces off the mirror to a sensor which will detect the point at which the mirror is fogged. The temperature at this point corresponds with the dew point. These types of hygrometers take a long time to equilibrate before you can get a stable reading, as they have many parts and cannot tolerate being moved around or jostled. Typically you will need a second chiller instrument to get the temperature low enough to reach the necessary dew points.
- Detector Tube: These work with a chemical stain or reagent that progressively changes color as the water vapor in the air reacts with the media. While detector tubes are inexpensive, fast and easy to work with, they do have a few drawbacks. Reading the tube has a subjective element made more challenging by the non-linear scale. Detector tubes are less accurate than the previous two methods, but do tend to be suitable for most uses.
Why Water Vapor Tests Fail:
Contamination is the number one reason why a water vapor test might fail. A tiny amount of water will make a very big difference in your dew point, particularly for stricter classes. For a Class 1 or Class 2, a single PPM of water vapor can raise the dew point by 10 degrees Celsius. A fingerprint can contain enough water to make the difference between passing or failing results. Most tubing is permeable to water and therefore your materials can cause contamination as well.
Leaks can also cause a test to fail because they have the ability to pull in water vapor from the environmental air. We find that old or ineffective filters are a huge factor in failing tests. You should change your filters at least as often as the manufacturer recommends, if not more frequently. Poor placement of condensate traps can also introduce humidity into your air stream.
Sampling port orientation can also have a huge impact on results. Downward or vertical orientation can cause water to collect, and contaminate the air stream.
Methods for Compressed Air Oil Aerosol Detection:
- Membrane Extraction: This is the most common way to test for oil aerosol in your compressed air. A polymer media or glass fiber is used inside a filter to collect oil aerosol droplets. When you pull the filter out, you can either extract the oil, or weigh it by a difference.
- IR Spector: This system is simple and robust as well as inexpensive. Issues that can arise generally come from particles that can interfere with the collection of oil vapor. O rings, polymer tubing or rubber tubing are all soluble to the solvents used to extract and therefore can result in contamination that will be counted as oil aerosol even though it is not. The sampling time can also be long because the limit of detection is based on the volume of air that goes through the membrane.
- Detector Tubes: This choice is advantageous in that these tubes are inexpensive and fast. However, they don’t see everything that might be oil. They are calibrated against a few different contaminants. The tube cannot differentiate between aerosol and vapor. A risk assessment will help you understand if a detector tube is precise enough for your testing needs.
- Impactor Tool: Oil droplets will impact the membrane at the end of the impactor. There are 5 ink rings that are soluble by the oil. You measure the amount of oil based on the bleed of the ink. Essentially, this is a reading based on how much the ink smears which inherently leads to subjective results and lowered accuracy. Impactors also have very poor limits of detection and are not able to see oil at levels lower than about 2 mg per cubic meter. If your class is stricter than that, then an impactor is not an appropriate tool to use.
Why Oil Aerosol Tests Fail:
Again, old and ineffective filters are the most common cause for failing test results. It’s important to change your filters often to avoid contamination. Ensure that you do quality research on which filters are right for your system and your product’s safety. Poor placement of filters and condensate traps can also allow oil aerosol to pass through to your testing media. The closer your condensate trap is to your point of use, the more likely you are to get oil aerosol coming through. Oil aerosol clings tightly to polymers so if you are using a lot of polymer materials in your system, you may experience a high level of contamination.
Sampling points that require lubrication, like valves and measuring devices, need to be carefully cleaned, or those lubrications might end up in your aerosol analysis. Ensure that your sampling points are not vertically or downward oriented, as oil can pool and collect in those areas.
Methods for Compressed Air Oil Vapor Detection:
- In-Line Instrumentation: These are typically Flame Ionization Detectors (FID) or Infrared Detectors (IR). FID instrumentation has a small flame and measures changes in that flame as vapors move across it and burn. IR uses infrared absorbance to determine the presence of oil vapors. They are both fast and provide real time results. However, they are almost always permanent installs. These machines are not something that you can carry around to different sampling points. They are both extremely expensive and require outside calibration.
- Detector Tubes: These are basically the same as the tubes found in tests for oil aerosol. These tubes cannot distinguish between vapors and aerosols. They will only indicate a small subset of hydrocarbons and are often inaccurate due to subjective readings.
- Desorption Tubes: These tubes are a compromise between accuracy and cost when it comes to detecting oil vapor in you air stream. These are fairly inexpensive and trap the hydrocarbon vapors in charcoal. After the test is complete, the lab will extract the hydrocarbons from the charcoal using a solvent. This will then be analyzed and you will receive a report that can characterize compounds. You will know exactly what is contaminating your system. Keep in mind that if you have extremely high levels of oil in your system, the desorption tubes can be overloaded, skewing results.
Why Oil Vapor Tests Fail:
Once again, the presence of ineffective or old filtration systems can cause you to fail your oil vapor test.
Sampling point and/or intake contamination tends to be a very common cause of failure. If you use solvents to clean your point of use, these will show up in your results. The most common is limonene or pinene from cleaning supplies. If you use Pine Sol on the floor or lemon cleaners on the tables, your oil vapor tests will pick that up. Fuels, exhaust fumes, cleaning agents and lubricants can all cause contamination.
Methods for Compressed Air Microbial Detection:
There are two types of testing that can be done for microbial: qualitative and quantitative. Qualitative is looking at what the microbes actually are, while quantitative is looking at how many microbes you have in your system.
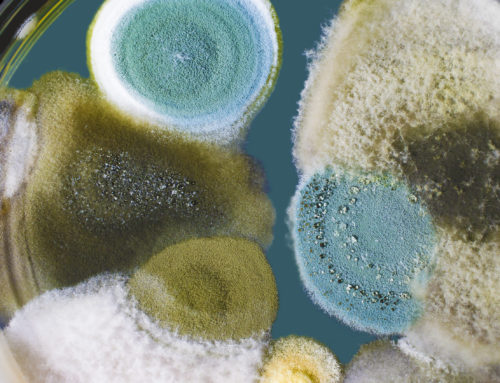
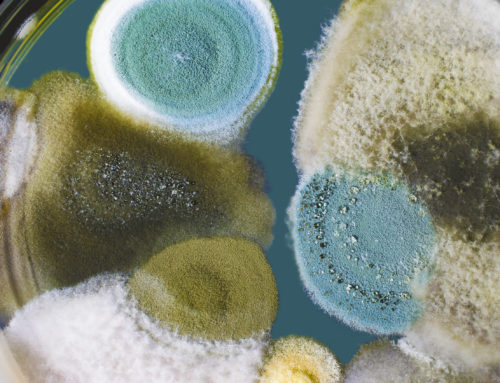
- Microbial Impaction Samplers: The are best choice for qualitative testing. Typically, you’ll put a petri dish into the sampling unit. It will have agar media, like Tryptic Soy Agar (TSA), which will grow just about anything. You will blow air through the system and then send the sampling media back to the lab for analysis. Some labs are capable of determining both qualitative and quantitative results using this system.
Why Microbial Tests Fail:
Poor, old or ineffective filtration is the main source of failure for microbial tests as well. The only places where microbes usually grow in a compressed air system are in condensate and coalescing filters. These are particularly habitable for microbes. Because of this, you must ensure that you have good particulate filters.
Environmental contamination and poor technique are the most probable causes of test failures. You need to be very, very careful when handling the media. If you touch it with your bare hands, with dirty gloves, or if you sneeze on the media, or leave it open too long, you will definitely see growth on your plate. Your skin has all types of microbes on it. Basically everything in your environment has contains microbes that will grow on the agar. Handling them with aseptic technique is essential to achieving passing results, as microorganisms are everywhere and get into everything.
Best Practices:
- Piping and tubing should be horizontal or slanted upwards
- Use non-porous, smooth and non-permeable materials
- Avoid connections using metals of different hardness
- Ensure proper application of tape, dope and solder when needed
- Avoid ball valves where possible and use non-shedding materials such as PFTE or PFA
- Do not use conical thread fittings where possible
- Stay away from materials that corrode or deteriorate such as black iron or rubber
- Replace filtration more frequently than indicated
- Clean sampling apparatus, sampling points and FLUSH FLUSH FLUSH
- Use compression fittings or face-sealing cylindrical threads where possible
- Use appropriate and high quality sampling point filtration.
Have questions? Our team of experts is here to help!


